What are you trying to say, and who are you trying to say it to?
We all take photographs for different reasons. To take a photo we're proud of, to win a competition, to make a walk more interesting, or because we said we'd take a photo every day for
a year. Maybe it's to show off, to hang on the wall, or because we want to preserve our children or grandchildren's childhood. It might be just to learn how to use the camera, or to be popular on Instagram.
Whatever your reason, even if it's just because you want to finish this week's project, someone will look at your image. It might just be you having a quick glance on the back of the camera before you delete it. Or, hopefully, at least one other person will see it.
The point is - you have a chance to speak to the person looking at your photograph. You owe it to yourself and to that person to think about what you want to say before you press the shutter.
Composition is the language of photography
Think of your composition as the language you use to speak to your viewer. Your camera
might be your voice, and the quality of light (which we'll start looking at next week) the tone of your voice - but the backbone of your photograph is the composition, the common language that you both understand.
Where do you put everything in the frame?
What do you leave out?
How to all the elements relate to each other?
How can you use these principles to reduce a 3 dimensional scene to a 2 dimensional representation that echoes the finished image you see in your head?
Becoming fluent
Of course there's no easy answer. But just as you learn any language, you first learn some vocabulary (everything we've covered in the last 3 weeks), and then you learn some grammar (what we'll look at today). You practise everything you've learnt, and add new vocabulary and grammar. You
keep practising and at some point you'll find you are putting everything together in longer sentences without even thinking about it. You are becoming fluent.
One day soon you'll take a photograph where you have unconsciously placed the subject where you want it, knelt down to get a better viewpoint and used a shallow depth of field to blur out the background.
THIS WEEK'S PROJECT: ADVANCED COMPOSITION TECHNIQUES
This week I want you to look at some bigger picture composition ideas. In previous weeks you've looked in isolation at techniques like the rule of thirds, using symmetry, having a single focal point. This week I want you to think deeply about why you take photographs generally, why you are taking the particular photograph you are about to take, and how you can use the language of composition to speak to
your viewer.
The first thing to do is post in the Facebook group the answer to the question:
"Why do you take photographs?"
You can be as literal or as philosophical as you like. There is no right answer, and I hope everyone will have a different reason.
Next - have a go at some more advanced composition techniques:
Advanced techniques to try
You've learnt a lot of composition vocabulary over the last 3 weeks. Here are a couple of grammar points you can bear in mind when you're assembling your photographs:
1. Visual weight
This extends the principle of having a single focal point, and thinking about the balance between subject, foreground and background.
How much of the viewer's attention does each element of the photograph claim?
There is more to this than just how big something is in the frame:
- faces will automatically draw the viewer's eye, no matter how small
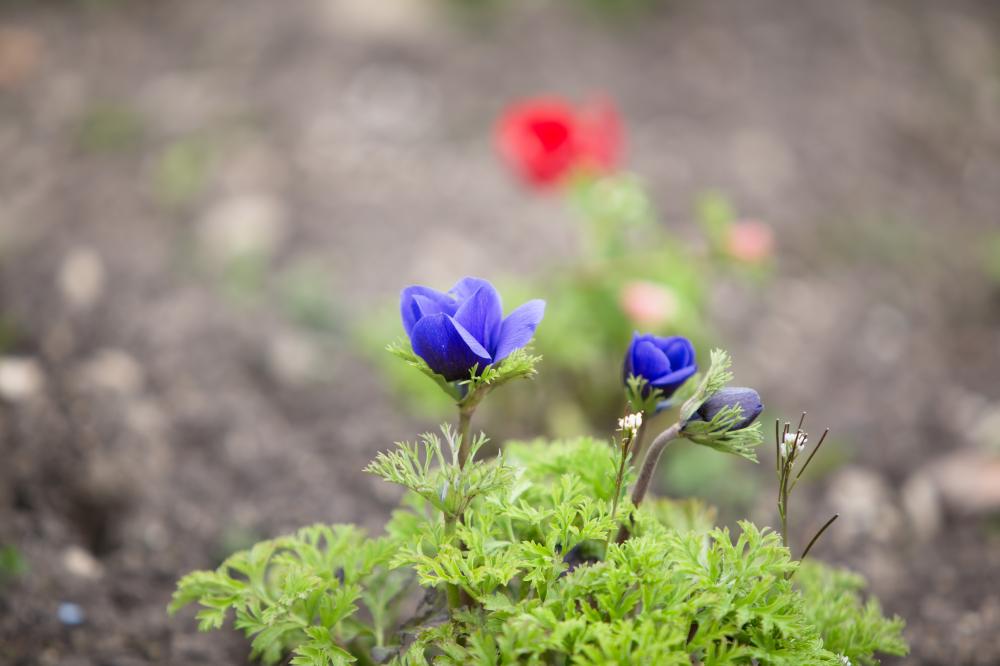
- anything red will attract a disproportionate amount of attention
- specular highlights (white spots or burnt out areas) will also draw attention
- anything that contrasts with the rest of the frame will stand out - not just colour, but things like a large expanse of shadow next to a more textured subject, or a bird flying out of the frame when all the others are flying in
Look how many things there are in this image to distract you from the blue anemone:
|