|
|
|
|
Week 3: shutter speed
Last week we looked at how aperture controls both the amount of light hitting the sensor, and the depth of field of an image. Shutter speed is one of the other things the camera (or you) has under its control. And, just like aperture, as well as being able to control the amount of light hitting the sensor, it has its own creative effect - the ability to freeze or blur any movement in the image.
If you are struggling with last week's aperture homework, you might find this post useful. In it I run through the most common issues people have: Problems You Might Have When Learning About Aperture.
Announcements
Facebook Page: there is a new AYWMC Facebook Page. Head on over and have a look. Every Thursday I'll be posting an informal photo challenge - this week's topic is "Changing seasons".
|
|
|
|
|
|
|
|
|
SHUTTER SPEED
Shutter speed is one of the other things the camera (or you) has under its control. And, just like aperture, as well as being able to control the amount of light hitting the sensor, it has its own creative effect.
What is the shutter speed exactly?
It's simply the speed at which the shutter opens and closes.
The shutter is a metal curtain that is just in front of your sensor. Most of the time it is closed. But when you press the shutter button it opens briefly. The time it stays open for is known as the shutter speed. To take a sharp image, this usually has to be only a fraction of a second.
Creative control
With aperture, you get the ability to control the depth of field.
With shutter speed, you get control over the amount of blur in the image. Sometimes you want blur, sometimes you don't. The camera doesn't know whether you do or don't, and it will always always always pick a mid range shutter speed by default. So if you want anything at the extremes - a very blurred image, or a super sharp image, you have to take control:
|
|
|
|
|
|
|
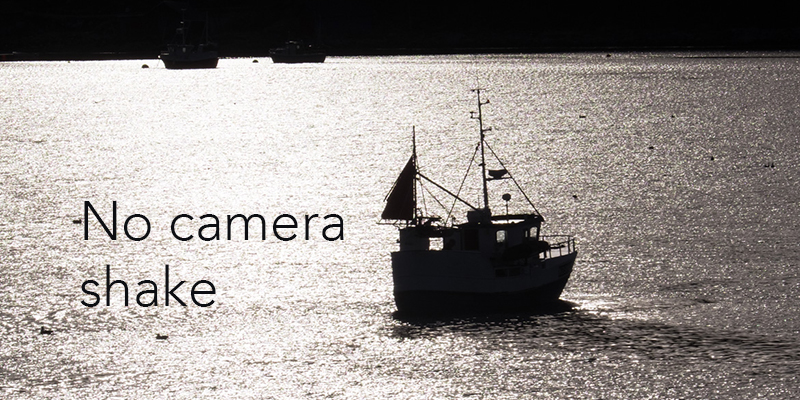
Blur, or camera shake?
If your subject is moving too fast, it will record as a blur.
If your hands are shaking, you will get camera shake.
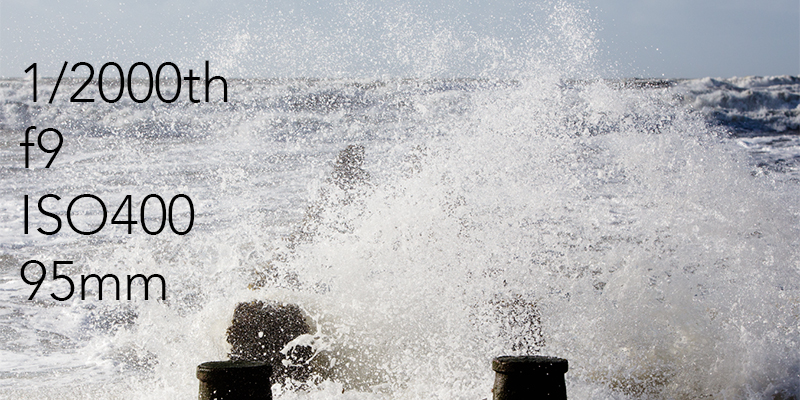
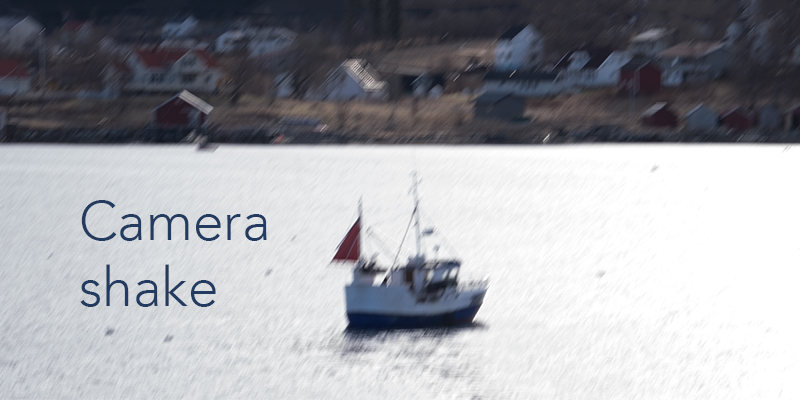
In the first photo below, the boat wasn't moving that fast, but I moved the camera so got camera shake. In the second photo, the shutter speed was fast enough to compensate for my camera shake.
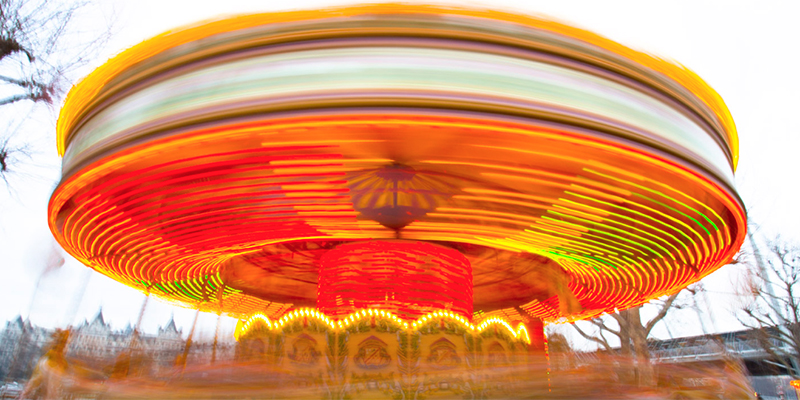
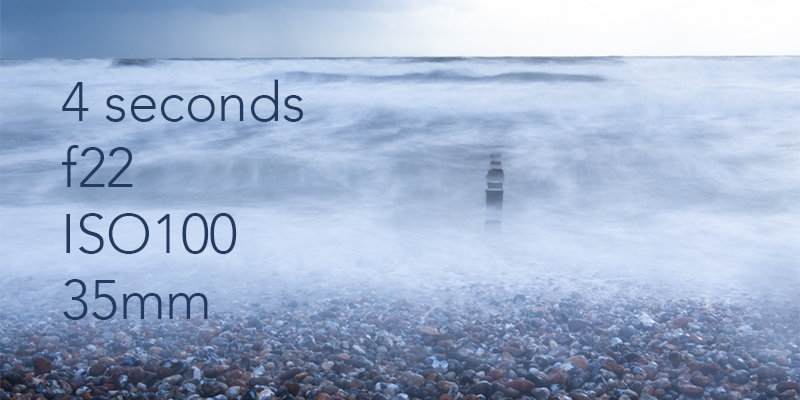
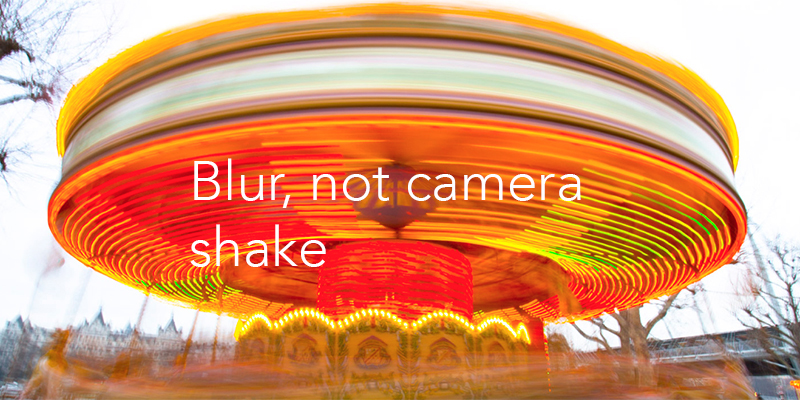
In the last photo, the shutter speed was 4 seconds but there isn't any camera shake because the camera is rock solid on a tripod. The blur you see is all caused by the movement of the merry go round - nothing is caused by the camera moving.
|
|
|
|
|
|
|
|
|
Both blur and camera shake are caused by the same thing (a shutter speed which is too slow), but the blur is related to the subject (which you probably can't control), and camera shake is related to yourself (which you are more
likely to be able to control). Don't worry too much about the difference between blur and camera shake - if you're seeing any kind of unwanted blur, it's a sign you need a faster shutter speed.
Fast or slow shutter speed?
A fast shutter speed opens and closes fast. A slow shutter speed opens and closes more slowly.
Can you see that if your subject moves whilst the shutter is open, it will record as a blur?
And can you see that if your shutter opens and closes in a fraction of a second - faster than the subject is moving - you will be able to freeze the action?
So you need to decide whether you want everything in the image crisp and sharp (fast shutter speed), or if you are happy to include some motion blur (slower shutter speed).
You'll need your manual. Download it here if you don't know where it is:
|
|
|
|
|
THIS WEEK'S PROJECT
Take 2 photos which are exactly the same, except for the shutter speed.
Step 1
Find out how to put your camera on to Shutter Priority mode. This is where you choose the shutter speed, and the camera sorts the rest of the settings out. (Google it if you don't want to read your manual: "How to put a Fuji XT1 onto shutter priority mode".)
Step 2
Find out how to change your shutter speeds. They are measured in fractions of a second, and will be displayed either as "60" or "1/60" (for 1/60th of a second). Your camera might give
you shutter speeds of 1/50th or 1/160th. These are just fractional speeds, between full increments. (Like 2.5 comes between 2 and 3). Check your manual to see how your camera shows shutter speeds.
Step 3
On shutter priority mode, in a well lit place (preferably outside), take 2 photos of the same moving subject:
1. with a slow shutter speed (something really slow - 1/2 second, or a whole second); and
2. with a fast shutter speed (the fastest you can do with the light you have around, try 1/500 at least, 1/2000 if you can manage it).
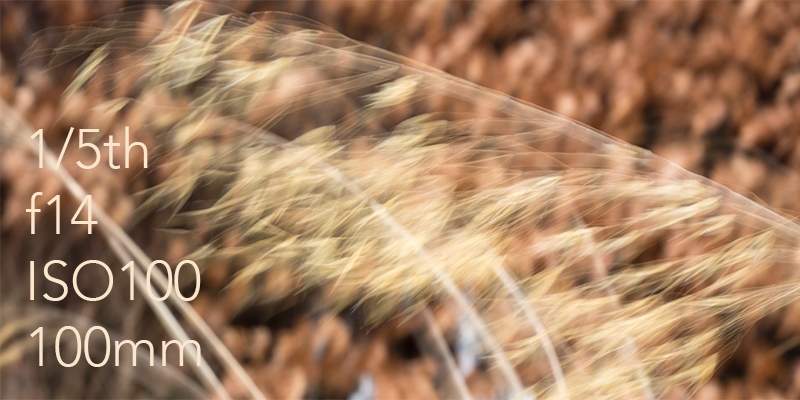
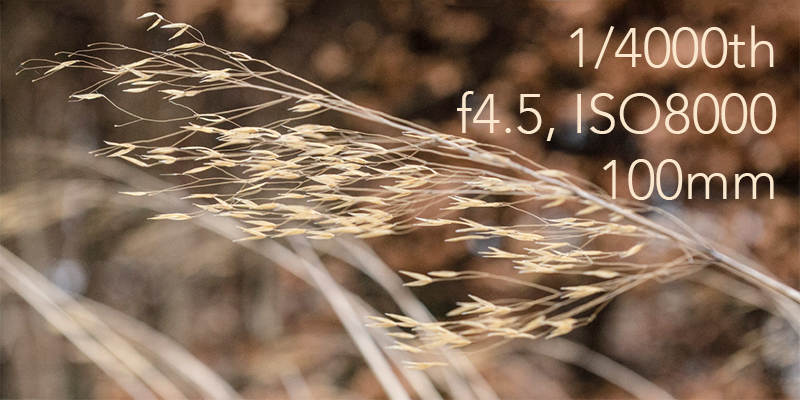
These two images of grass were taken in storm force winds (they should have been upright). Even at 1/4000th of a second (2nd image), there is still a bit of blur in the grass:
|
|
|
|
|
|
|
What should happen is that you get one blurred image, and one very sharp image (or at least, your
subject is sharp - don't worry about the background).
Pick a subject that's moving reasonably fast - someone running (across the frame, not towards you), a car (careful where you stand), something blowing in the wind, water running from a tap, or even just someone's waving hand up close. Those of you with cats, dogs and toddlers will be ahead of the rest of us on this one.
TROUBLESHOOTING
I've put the most common troubleshooting issues in a short post. There's also a more advanced project to try, if you already understand shutter speeds:
|
|
|
|
|
|
|
RECAP
1. Read this email, and the troubleshooting post if you need to.
2. Put your camera onto Shutter Priority Mode.
3. Do the project: take 2 photos, 1 with a short shutter speed, and 1 with a longer shutter speed.
4. Try and freeze
the action with a short shutter speed, and blur it with a longer shutter speed.
5. Don't try and learn all the numbers, or think you have to remember everything in this lesson. If you can do all the steps whilst reading the instructions, you are on track. There will be plenty of opportunities to practise this again throughout the year, and I will keep reminding you what to do and when to do it.
6. Don't forget - done is better than perfect.
|
|
|
|
|
|
|
Next week: it's an easy week next week - we cover ISO, and how it is like having an emergency blast of sunshine in your back pocket.
See you in the Facebook group. Ask any questions you have about the project over there. Post your homework photos in the thread - Homework 28 September. There will be a link to the thread in the pinned post.
Have fun, Emma
|
|
|
|
|
|
|
Some reminders...
Don't forget there's a new informal weekly challenge on the AYWMC Facebook page (different from the private Facebook group). This week the topic is "Changing seasons". Visit the new FB Page here: AYWMC Facebook Page
Have you joined the private Facebook group yet? It's the best place to meet people and share your progress. The group is closed to anyone not doing the course, so you will need to answer the question about this email when prompted. Click here to join the private Facebook group
And we're also on Instagram - use the #AYearWithMyCamera hashtag, and the #Make30Photos hashtag as well if you're working through those prompts.
There is a time-limited discount coupon available for the first module of the video version of AYWMC for the duration of this 6 week course only: Claim 50% off Get Off Auto module
|
|
|
|
|
|
|
Emma Davies Photography, Marigold, East Bracklesham Drive, Bracklesham Bay, Chichester, PO20 8JW, United Kingdom
|
|
|
|
|