|
|
|
|
Week 4: ISO
Quick recap...
We've looked at how the camera behaves on auto exposure (it turns the world a mid-grey tone). We've shown how aperture not only affects how much light comes through the lens but also affects depth of field.
Last week we explored shutter speed, and how it affects blur and camera shake. This week we're looking at the third and final option the camera has to control the amount of light used in image creation: ISO.
Before we start - don't forget
#1Day12Pics this Saturday (it's always the first Saturday of the month). More details in this post: What Exactly Is #1Day12Pics?
Announcements
Video course: don't forget you can claim 50% off the video course version of this Get Off Auto module only whilst it is running (ie. now):
|
|
|
|
|
|
|
ISO
What is ISO?
ISO (which stands for International Standards Organisation) is just a measure of sensitivity.
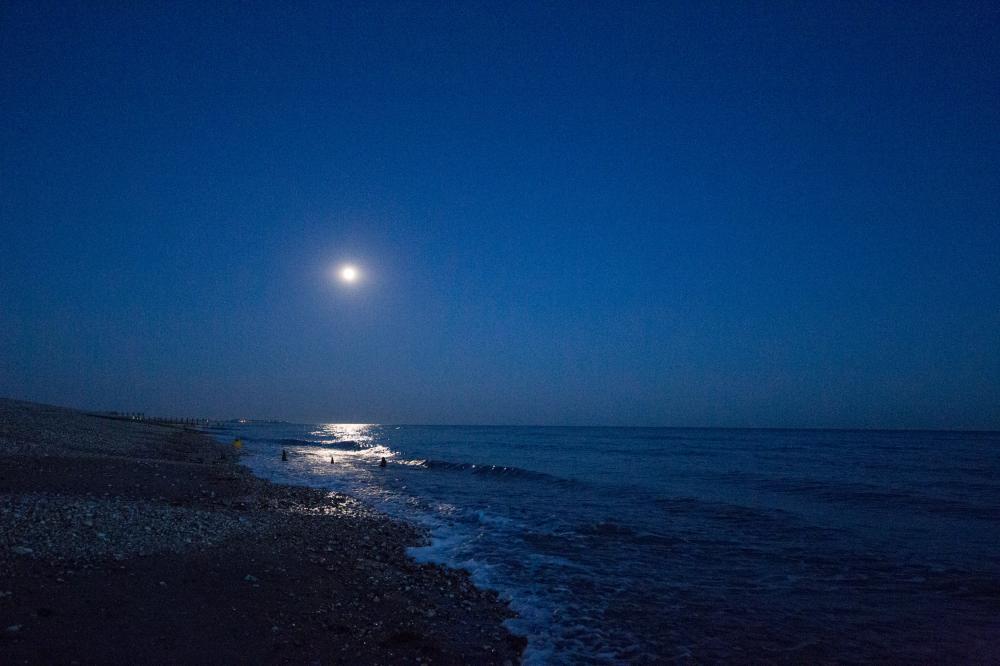
In the days of film cameras, the film you chose had a fixed sensitivity to light, called the ISO. A low ISO (50) was used in very bright conditions (not very sensitive to light). A high ISO (1600) was used in darker conditions (more sensitive to light).
Now ISO refers to the sensitivity of the sensor to light. In the days of film you were stuck with the same ISO until you'd finished your roll of 24 or 36 shots. If you moved
from the beach to inside a museum, your ISO would be wrong. But with digital, you can change the ISO for every shot if you want to.
|
|
|
|
|
Why not just stick your ISO on high and leave
it?
It might seem appealing just to use a high ISO and be able to take photos in low light easily. But the downside of using a high ISO (very sensitive) is the noise. In the days of film, it was called grain, and made those arty black and white shots so memorable. Nowadays it's not as attractive, and the amount you get is entirely dependent on how expensive your camera was. You might have wondered why some cameras are so much more expensive - one reason is the quality of the sensor, and the degree to which the image quality deteriorates at higher ISOs.
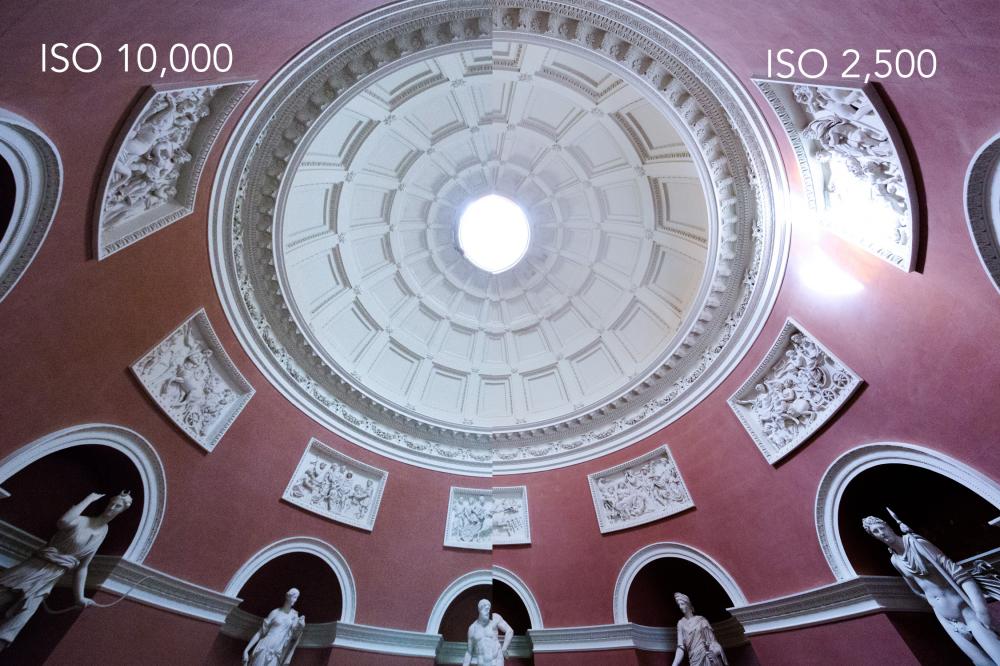
Here's an example. These are 2 photos (look closely) that were taken at the National Trusts's Stowe House & Gardens:
|
|
|
|
|
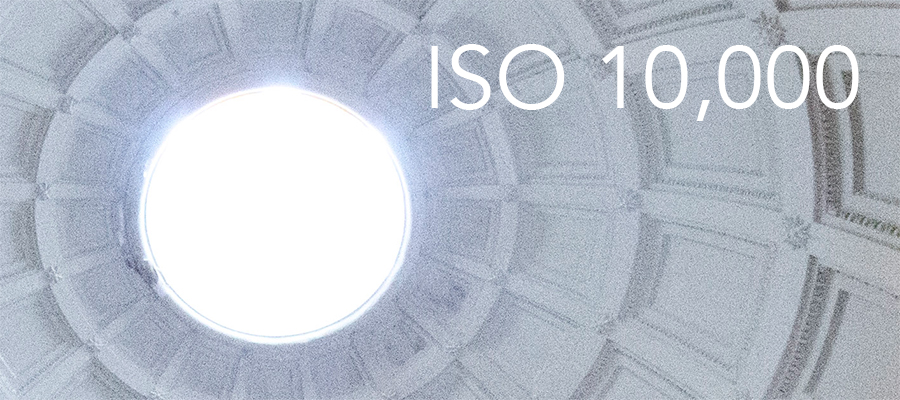
The left image was taken at ISO 10,000, and the right at ISO 2,500. You can't really see the difference viewed at this size, but when you blow the images up to 100%, the difference is more noticeable. You can see it most in the shadows. Look at the noise (or grain) in the ISO 10,000 image, compared to the ISO 2,500 image:
|
|
|
|
|
|
|
So, whilst aperture and shutter speed had creative effects, as well as affecting the amount of light reaching the sensor, ISO really just has a potential downside. Just remember that the higher ISO you use, the more the quality of your photo will degrade.
If you can't see the difference clearly in this email, just pay attention when you are doing the homework. Make sure you
download your images and view them at 100% on your computer. You should see a startling difference in the quality of images taken at lower ISOs to those at very high ISOs.
How to change ISO
There is no 'ISO priority mode', like you have aperture or shutter priority modes.
Changing ISO will depend on your camera, so make sure you have your manual ready.
|
|
|
|
|
The easiest method - Auto ISO
If your camera is newer (or more expensive), you might have Auto ISO mode. This means that whatever mode you are using, the camera will automatically choose the lowest possible ISO.
You
can also change the defaults in the settings, to limit the upper ISO. This is useful if you definitely don't want to go above a certain ISO. I usually have my upper ISO set to 400 for a professional shoot, or no limit for personal shoots. On professional shoots the quality of the images is fundamental, and I must use other ways of getting the shot rather than relying on high ISOs, but for personal work I'd often rather get the shot no matter what the ISO. (Which is why I ended up with an ISO of 10,000 in that dark temple at Stowe.)
Just be aware that on some cameras, on some modes, Auto ISO won't work. For example, it might only work on Program or Auto mode, not on Shutter or Aperture priority. This is where you need to read your manual. First, find out if you have Auto ISO. Then find out if there are any times when it won't work.
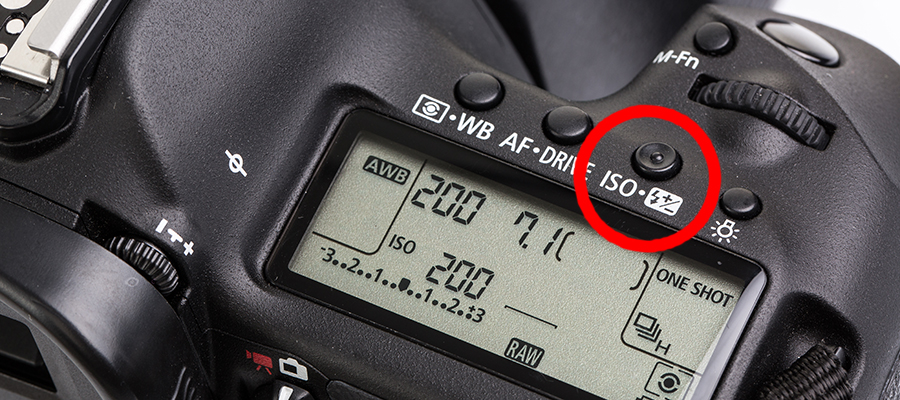
Manual ISO
It is very useful to know how to change your ISO manually, and if you don't have Auto ISO, you'll need to know how to do this. Look it up. It's probably a button on the top of your camera ("ISO"), and then one of the dials to increase/decrease. Don't forget to put it back to a lowish ISO once you've finished.
When to change ISO
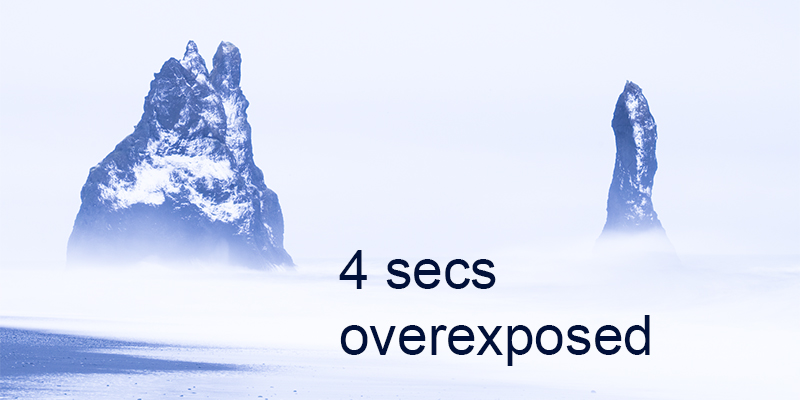
You might have noticed, especially on the shutter speed exercise last week, that when you were at extremes (very high or low shutter speed, or very wide or small apertures), you got images that were too bright or too dark (over exposed or under exposed).
This happened because your camera had reached its mechanical limits. If you were outside and using a very long shutter speed during the middle of the day, on shutter
priority mode, your camera would have selected the tiniest aperture possible to compensate for the very long shutter speed. But at some point, it would not be able to make the aperture any smaller, and because you were using a long shutter speed, light would continue to pour into the camera and onto the sensor, overexposing the photograph:
|
|
|
|
|
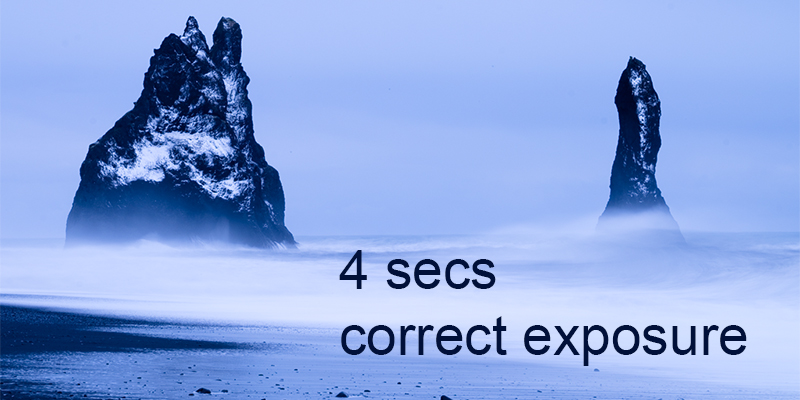
In this situation, you need to make the ISO LESS sensitive to light (make it a smaller number):
|
|
|
|
|
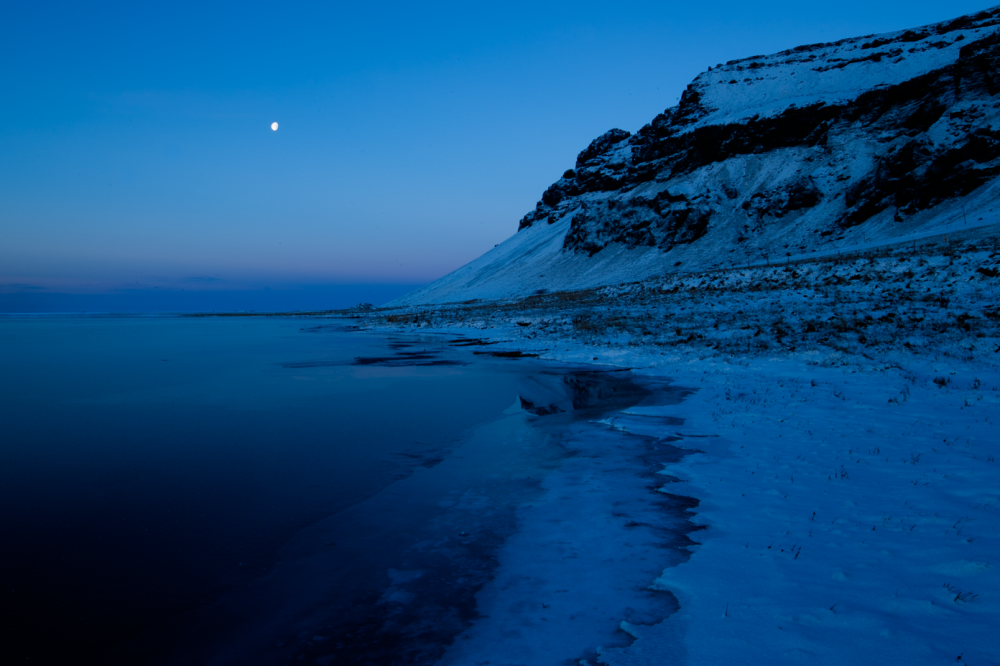
Similarly, if you were on aperture priority and using a tiny aperture to get a big depth of field, at some point your camera will not be able to use a long enough shutter speed to compensate, and your image will be too dark. Or, more likely, you won't want to use a longer shutter speed because you'll get camera shake:
|
|
|
|
|
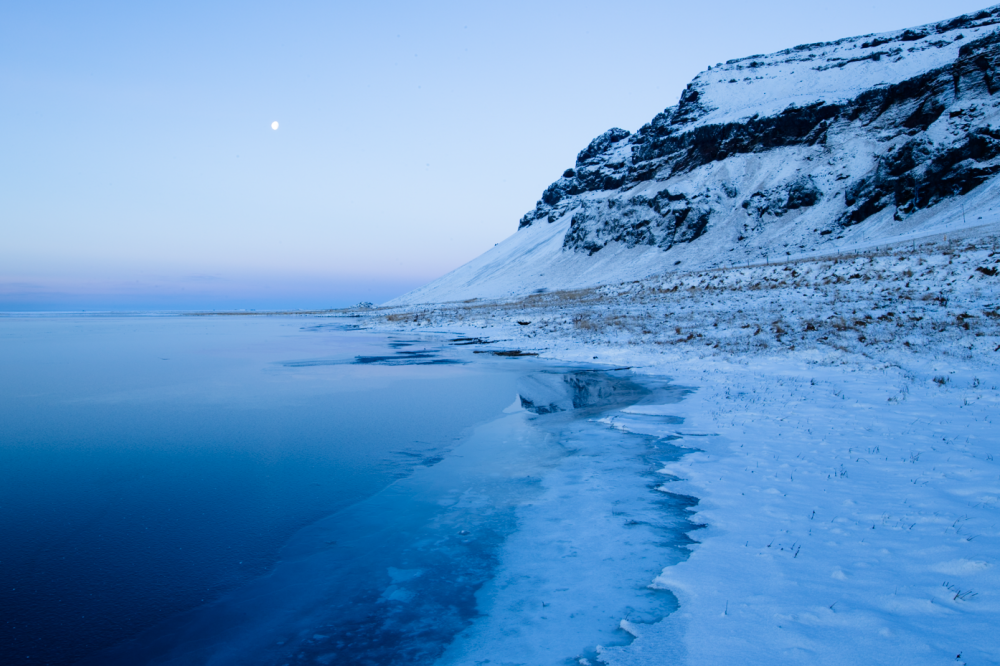
In this situation, if you didn't have a tripod to allow you to use a long shutter speed, you'd increase your ISO to make the sensor more sensitive to light and achieve the correct exposure:
|
|
|
|
|
THIS WEEK'S PROJECT
Step 1
Work out how to change your ISO manually. Also find out if
you have Auto ISO, and whether it doesn't work on any of your modes.
Step 2
You are going to pick either the shutter speed or aperture exercise from the last couple of weeks, and do it again but with ISO as a backup.
So - let's say you decide to try the shutter speed exercise again. On your fastest shutter speed (let's say 1/2000th), you might have found your images too dark. Go into your ISO settings, and change your ISO to it's highest possible setting. Don't worry about the fact your images will be full of noise - the purpose of this exercise is just to see how changing your ISO gives you a backup option.
Or for the slow shutter speed (eg. 1 second), change your ISO to the lowest possible setting. The effect won't be as noticeable at the low settings because your camera will already
be picking a low ISO for you if possible, but you might find you can go from 200 down to 50.
For the aperture settings: for the biggest aperture (smallest number, eg. f4), you'll need to be reducing the sensitivity of the sensor to compensate for all that light pouring in, so pick a low ISO. For the smallest aperture (biggest number, eg. f22), you'll want to increase the sensitivity of the sensor, so pick a high ISO.
|
|
|
Step 3 - Troubleshooting
This is a fairly straightforward week's exercise, and I think the most problematic area will be working out how to change your ISO. There's no shortcut - look in the manual.
If you want any help, the Facebook group is full of people ready to do what they can. If you are having trouble changing your ISO and want help, please make sure to say which camera you are using.
|
|
|
|
|
The first module of the AYWMC video course is now live. It covers the first 6 weeks of technical
lessons, and gets you off auto and shooting on Manual mode. Claim your subscriber's 50% discount now:
|
|
|
|
|
Modules will be added to the video course as we progress through the year. You will be able to claim a 50% discount for the duration of the current module, then that module will revert to full price.
|
|
|
|
|
RECAP
1. Read this email, and find your manual.
2. Work out if you have Auto ISO, and also work out how to change your ISO manually.
3. Redo one of the previous homeworks, this time with ISO as a backup.
|
|
|
|
|
|
|
Next week - hold onto your hats, we'll be shooting fully Manual. (I promise everyone who follows the steps will be able to do it.)
See you in the Facebook group. Ask any questions you have about the project over there. Post your homework photos in the thread → Homework thread 5 October. There will be a link to the thread in the pinned post.
Have fun, Emma
|
|
|
|
|
|
|
|
|
|
|
|
|
Emma Davies Photography, Marigold, East Bracklesham Drive, Bracklesham Bay, Chichester, PO20 8JW, United Kingdom
|
|
|
|
|